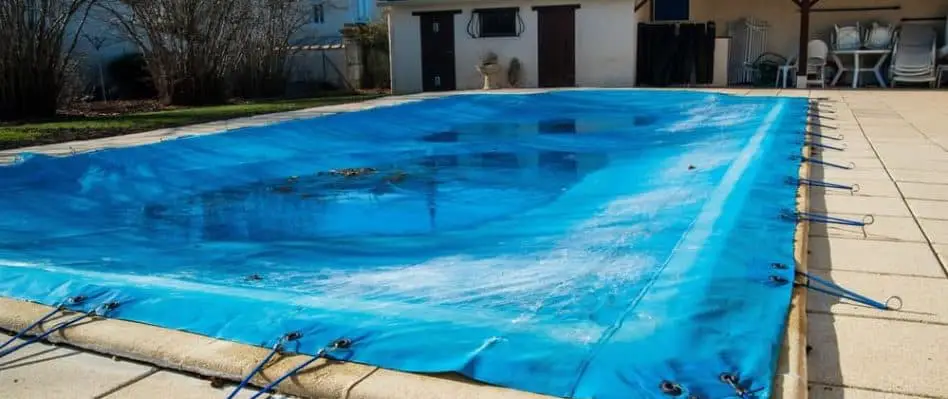
Are you wondering how to winterize an inground pool?
Then you’re in the right place.
I think you’ll agree with me when I say: pool closing season is not nearly exciting as opening it for the summer, but it’s a job that every pool owner must do.
In this guide, you will learn:
- All the gear you’ll need to get started closing down your inground pool
- The 9 steps to follow to make winterizing your pool a success
Ready to dive in?
Gear you’ll need to get started
Before you get started, make sure you have the following gear and tools handy:
- Pool skimmer (net)
- Pool brush
- Pool vacuum
- Winter cover
- Winter chemical kit
- Winter plugs for return jets
- Air compressor or blower
Step 1. Clean your pool
The first step in closing your pool for the winter is to give it a thorough cleaning.
Manually skim off any debris floating around, then scrub the surface down good with your pool brush, paying particular attention to any areas you see buildup, algae or dirt.
Once you have thoroughly brushed your pool, run the vacuum (or do it manually) to get up any loose debris that might have sunk to the bottom.
Step 2. Test & balance your pool water
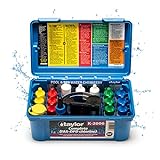
- Comprehensive Pool & Spa Test Kit: Ensure your pool, hot tub or spa is safe and balanced with this all-in-one testing kit. It checks for free and total chlorine, pH, acid/base demand, total alkalinity, calcium hardness, and cyanuric acid.
- Accurate & Easy to Use: Enjoy hassle-free water testing with simple and highly accurate tests. Includes color-coded instructions, a treatment guide, and a waterproof pool and spa chemistry guide for quick reference.
You’ll now need to test your water to make sure all the chemicals are properly balanced.
You probably already have a pool chemistrytest kit that you use and this will work fine. But you can also take it to your local pool store if you’d like a more accurate reading.
If you choose to test it yourself, make sure your levels are within the recommended ranges or just a little bit higher since they are likely to drop during the cold months of winter.
- pH: 7.4-7.6
- Chlorine: 1.0-3.0 ppm
- Total alkalinity: 80-140 ppm
- Calcium hardness: 200-400
- Chlorine level: 5 ppm and below
Even if you don’t normally test all of these levels, it’s super important that you do so before closing the pool for the winter.
If any of these levels are off, your pool could suffer undercover from corrosion, algae and buildup.
Step 3. Add your winterizing chemicals
I mentioned earlier that you’d need a winter chemical kit, but you don’t necessarily have to go that route if you have the chemicals you need on hand or if you’d rather buy them individually. (A winterizing kit will allow you to buy fewer pool chemicals separately, however).
But the winter kit will make things easier on you since it has everything you need, and it will save you a little money.
Here are all the chemicals you will need:
- Chlorine (tablets, powder or liquid)
- Pool shock
- Sodium Bicarbonate (to raise pH levels if necessary)
- Algaecide
Shock the pool first, following the manufacturer’s instructions, 24 hours before you plan to close it.

- Apply to pool 1x per week
Then retest the levels to see which chemicals need to be added to bring them within normal ranges.
Follow up with algaecide right before you close your pool.
Step 4. Lower the pool water
Lower the pool water a good foot to foot and a half below your skimmer if you are using a mesh cover, or just a few inches for solid covers.
Although people have varying opinions on how much you should lower your water levels, most agree that you should never drain it completely.
Why?
Because if you lower your pool water too much when using a solid cover, you are allowing air to circulate below the cover, causing dryness and damage.
Make sense?
It also subjects it to excessive sagging if it is to get filled with rain or snow, causing it to stretch and rip.
You should, however, at least lower it some. Otherwise the water can freeze and damage the skimmer.
Step 5. Remove your deck equipment
Remove any equipment attached to your pool, such as rails, skimmer baskets, eyeball fittings, ropes, ladders, or diving boards.
Store everything in a safe area where it won’t be damaged by harsh weather.
Step 6. Blow out the lines
For inground pools, the lines have to be blown out with a blower, shop vac, or air compressor. You can hire someone to do it, but it’s actually not that difficult to do it yourself if you know what you’re doing.
First, you’ll want make sure the skimmers are almost completely emptied by scooping out any water left over after lowering.
Open your valves to open the main drains by setting to re-circulate if that option is available.
Then open the drain plug and connect your blower to the pump. Sometimes this requires a special adaptor when using something besides a pool blower (like an air compressor).
You’ll start to see air bubbles coming out of the skimmers and return lines. Go ahead and let it run while you do the next step—it will help you ensure that you’re plugging all the holes completely.
Now remove the blower and plug the bottom of all the skimmers with a winter plug. Also, plug all the return lines. Then turn off the blower.
If you have a pool heater, pull the drain plugs out and blow it out thoroughly.
You’ll want to make sure you get your heater completely dry to prevent freezing and cracking.
Put the plugs back in.
Step 7. Clean the filter & pump
There are three basic types of pool filters: sand filters, D.E. filters and cartridge filters.
Sand and D.E. filters require backwashing—here are the simple steps:
- 1Shut off the pump, roll out backwash hose, check waste line for any closed valves.
- 2Turn the multiport valve handle to backwash, or slide a push pull valve.
- 3Turn on the pump. Water should flow out backwash pipe or hose.
- 4Backwash until water runs clear, about 2-3 minutes.
- 5Shut off the pump, turn valve back to filter, turn filter back on.
- 6Note lower pressure on filter tank, and increased flow rate.
After backwashing and rinsing out the filter, turn the power off and set it to “winterize”.
Then remove the inlet hose from the pool pump and the outlet hose from the pool. Attach one of those to the pool’s inlet nozzle. Take the drain plug off the bottom of the filter and drain all the water.
If you have DE filters, you will backwash them as well, using the instructions for sand filters.
Then you will pull out the assembly and hose it off thoroughly to remove all traces of DE powder.
Cartridge filters can simply be removed and hosed off, then replaced back in the tank.
Swimming pool antifreeze
If you’ve blown out your lines thoroughly, you may not need pool antifreeze, especially if you live in milder climates.
But adding it could save your pool plumbing by preventing freezing and cracking, so it’s certainly not a bad idea.
You’ll need to follow the manufacturer’s instructions for how much to add, but most say about 1 gallon of antifreeze for every 10 feet of pipe. But that is for pipes with water still in them. For dry pipes, you probably won’t need much at all.
To add antifreeze, you simply pour it into the skimmer. Do not pour it into the filter or the pump or you could cause major damage. You can also add it to the other lines by using a funnel.
Keep in mind that pool antifreeze IS NOT the same chemical as the antifreeze you use in your car and they should never be used interchangeably.But it is still very harmful if ingested, so be sure to keep it out of the reach of children and pets.
Also, it’s important to note that it could have a dangerous reaction when in direct contact with chlorine, so do not add antifreeze to an automatic chlorinator or at the same time you are pouring chlorine into the pool.
Step 8. Disconnect the filter & pump
Disconnect and drain the water pump and all unused hoses.
Remove the pressure valve from the sand filter, and remove the drain plugs from the pump and put them in the pump basket.
When you’re sure everything is drained and dried well, store the items away in a dry place away from the elements.
Step 9. Cover the pool
Depending on the type of cover you have, you may need help putting your winter cover on.
If you’re using a tarp or other plastic cover, inspect it thoroughly before you put it on for holes or tears. You can use patch tape or duct tape to patch a lightweight cover, or a vinyl pool patch for vinyl covers.
For these types of covers, you may need to secure them in place with water bags or water tubes. Or if you have anchors, you can secure them that way.
Water bags are used a little differently in the winter. You will only want to fill them about ¾ full so so they won’t bust if they freeze. Check for any leaks as you fill them up.
If your pool cover happens to be heavy or cumbersome like most large covers can be, you’ll need to enlist the help of a friend to get it covered.
Be sure to ask them well ahead of time so that you are not waiting too many days after winterizing it.
OPTIONAL: A lot of people swear by pool pillows for closing their pools. And while they are especially important for above ground pools, they’re also great for inground pools as well.

- {SUPERIOR WINTER PROTECTION} Swimline air pillows serve as 'ice compensators', absorbing the pressure from freezing and expanding water, ultimately protecting your pool and cover from winter damage. Ensure your pool is protected during the offseason!
- {ENHANCED POOL COVER LONGEIVTY} Swimline Air Pillows stay under your cover, creating space that prevents water & debris accumulation in the center of your pool, extending the lifespan for your pool cover, saving you replacement costs and time.
A pool pillow is an air pillow you put on the surface of your pool underneath the pool cover.
What it does is create a little space between the frozen water and the cover.
This can prevent damage, both to the cover and to the pool liner because it helps prevent too much expansion if the water freezes.
Bottom line
Closing your pool for the winter is an essential part of keeping your pool and equipment trouble-free year round.
It also makes your job much easier when it’s time to open it again in the spring.
If you live in milder climates, you can skip certain steps like adding antifreeze, and you may even be able to keep your hoses and filters connected.
Just use your best judgment and ask your local pool supply store for help if you’re not sure what pools in your area require.
The work you do now will save you hours next swim season!